How to Macro
2005 legacy content
One common question is: How do I Macro? This page is here to help the newcomer along. If you are a seasoned veteran, you won't find much you didn't know. IWhen I created this page in 2005, I was doing a lot of macro and I was in the process of switching from a digicam setup to a dSLR, which meant that I had some first-hand experience with a lot of different methods. This page is primarily directed to SLR users, but also includes info for digicam users. In fact, the second example image here was shot with a digicam.
Okay, before we get into the various ways how you can do Macro, some remarks that are valid for all possibilities... Macro was commonly used to refer to photography at 1:1 with 35mm film photography. "1:1" means the image on the film/sensor is as large as the subject. This definition makes no real sense anymore (if it has ever), with digital photography having brought us a multitude of different sensor formats. Should we say that it's macro if a 50mm long subject fills the diagonal? Or if we can achieve a resolution of 1000 line pairs per subject length? So maybe it makes more sense to say that macro photography is photography of small things that can still be seen by the naked eye.
Without going into too much detailed physics, the most obvious change we notice as we increas emagnification is that our Depth of Field reduces. Depth of field refers to the range of distances in which a subject appears "sharp enough". And that DOF shrinks dramatically once we get into macro territory. Sometimes you can use this to your advantage...
 Eyeballing Pentax *ist DS Pentax DFA 100/2,8 Macro |
 Spider Dinner Olympus 2020 reversed 50mm/1.4 + flash |
To achieve more depth of field, you need to stop down the aperture, make it narrower. This reduces the light that reaches your sensor. Exposure time lengthens. If your bug moves or you do, the picture gets blurry. You need a tripod and a non-moving subject. Or...
...you need flash. I know many ambitious amateurs are reluctant to use flash, because we have all seen those dreadful flash photos from camera-integrated flashes that sit close to the lens and create terrible shadows. But we can do better! My flash info pages explain how an external flash works and how you can make the most of it, especially for macro use.
For all hand-held, non-studio macro work, I dearly recommend using a macro add-on that supports auto-aperture. You need to focus precisely, so you want the focus screen to be as bright as possible: You focus wide open. But the real exposure happens at a stopped-down aperture. If you have to manually stop down the lens (for example M42 lens on non-M42 camera), you will mess up the focusing. And as the DOF is so very shallow in, the focus will be totally off, a fraction of a millimetre makes a difference already.
From a tripod, this is less of a problem, so decide for yourself what you need. For example, if you use advanced techniques such as focus-stacking, you will probably use a completely fixed and manually-operated lens and move the whole assembly (lens and camera) on a macro focusing rail.
With that out of the way, let's start the different ways to do macro photography. We will talk about dioptre lenses, achromatic and single-element; reversed lenses, directly or as a relay lens; extension tubes; tele converters, standard and macro focusing ones; macro converters; dedicated macro lenses, new and old.
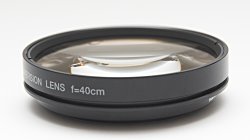
Dioptre lens
They are like glasses/spectacles for your camera and make it short-sighted. You screw them onto the front of your lens. You can stack them for increased effect.
Pros:
- Cheap
- Easy to use
- supports preflash if master lens does
Con:
- Image quality in the corners suffers a lot.
- Centre sharpness reduced.
- Extra magnification not dramatic
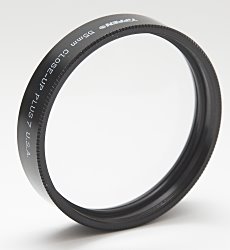
Achromatic Dioptre lens
Instead of a single glass element, these use two glass elements coupled to form a super-spectacle for your lens. If you look closely in the picture to the left, you can see a strange line, this is the image of the second element through the first element.
Pros:
- affordable
- easy to use
- supports preflash if master lens does
Cons:
- Extra magnification not dramatic
reversed lens in front of master lens
Use a reversed lens in front of your normal lens. A good combo is a bright 50mm lens (keep it wide open) on a semi-tele lens. The ratio of focal lengths is your magnification. If you attach a reversed lens to a digicam, you can calculate the equivalent magnification by dividing the equivalent focal length of the integrated zoom lens by the physical focal length of the reversed lens.
The reversed lens acts like a super-high-quality dioptre lens. This works well on digicams. The spider above was shot this way.
Pros:
- affordable
- very high quality
- supports preflash if master lens does
Cons:
- clumsy to use if you do not have a matching "retro coupling ring"
- can mechanically stress the master lens due to the large weight
- working distance can get very short
reversed lens
Use a lens mounted reversely to your SLR. Lenses are usually designed to be best at infinity. For Macro work, the distance gets into the same order of magnitude like the lens-film distance. It makes sense therefore to use the lens reversedly. A good lens to try this is a bright 50mm lens.
Pros:
- affordable
- very high quality
Cons:
- no aperture automation, therefore very impractical
- working distance can get very short
- no preflash support
Extension Tubes
Insert these hollow light-tight tubes between the lens and the camera to make the camera dramatically short-sighted. It works best with lenses that are not too tele. A 50mm lens at infinity needs 50mm of extension to get to a 1:1 magnification. A 135mm lens needs 135mm.
Pros:
- affordable
- image quality of the lens remains
Cons:
- working distance can get very short.
- not very effective on long lenses such as a 200mm
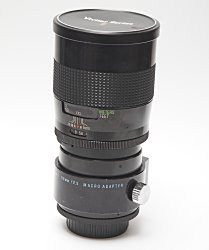
Tele Converter
This is about SLR converters which are mounted between camera and lens, not front-mounted TCs as they were popular on "prosumer" cameras in the early 2000s (Olympus TCON). Tele converters increase magnification by their factor. So, a 2x converter will make a 1:1 assembly from a 1:2 lens, this comes as a price, though, as the aperture diameter stays the same and the focal length increases, the f-number goes up: The lens becomes "darker" and a 100/2.8 1:2 turns into a 200/5.6 1:1. There are some extremely bad tele converters out there. Make sure to get one with 6 or 7 elements and one that has the contacts for aperture automation and preflash and read some reviews beforehand.
Pros:
- increased magnification
- long working distance
- often weak wide open
- non-digital converters may show a hot spot with flash
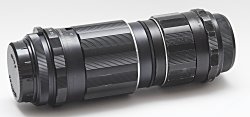
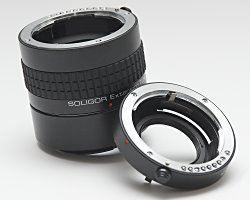
Macro Focusing Tele Converter
The Vivitar MFTC is a standard 2x tele converter with a short, variable extension tube integrated. Vivitar is the best-known brand, but others exist. I don't think any are still in production. You can combine a standard TC with an extension tube, but that combo would not focus to infinity, while the MFTC does. Pros:
- increased magnification
- long working distance
- doubles as teleconverter
Cons:
- Not nice wide open
- sometimes hot spot shows with flash
- extension mechanism does not support heavy lenses well
- Vivitar (maybe others) supports preflash
Macro Converter
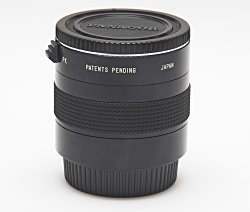
To my knowledge, Panagor was the only manufacturer to offer this special converter. It does not extend, doesn't focus to infinity and is no longer produced. Check what type of aperture control it allows for your camera brand.
Pros:
- increased magnification
- long working distance
- works with heavy lenses, too.
Cons:
- no preflash support
- (Pentax) only supports PK functionality (not PKA or later)
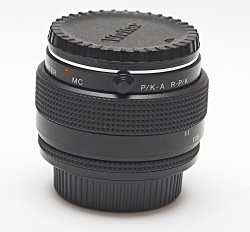
older Macro Lens
Older Macro lenses are a good alternative if you want a dedicated Macro lens but shy away from the extra cost of a current design. Manual Focus is ok for macro use, but you need to know whether older lenses will meter with your SLR camera. If your camera uses a preflash metering system for flash, you need to know whether the lens supports it. For Pentax any A and later lens does, this includes A, F, FA, DFA and DA.
Pros:
- very high quality
- good working distance
- often affordable
- flatness of field
Cons:
- Older designs and coatings often have problems in harsh lighting like flash, backlighting or strong specular reflections. This shows as a hot spot, ghosting or reduced contrast.
- Lack of AF can mean limited use outside of macro
"Digital" Macro lens
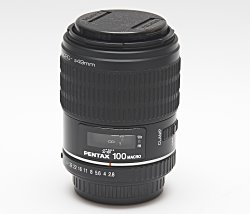
A Macro lens optimized for use on digital SLR cameras. Most of these will support AF, but there are some high quality options (Laowa for example) that don't. Since I initially wrote this page in 2005, there are now a bunch of good quality but affordable macro and semi-macro lenses available, including dedicated APS-C ones, with good support for dSLR and mirrorless cameras.
Pros:
- very high quality
- good working distance
- often affordable
- flatness of field
- OEM ones support preflash
- double as high quality general purpose AF lenses
Cons:
- Often expensive, at least for longer focal lengths.
Conclusions
So, that's it for now. This page might expand in the future.Please note that you can combine various components of that table:
You can mount a dioptre lens onto a Macro lens, use a macro lens on extension tubes and so on...
copyright 2005..07, 2019 by Jens Roesner