Main: www.jr-worldwi.de/photo/
IR illuminator
Back to the Olympus C-x0y0 modding page
Be sure to read my modding disclaimer here before proceeding.
Well, everyone concerned with security cameras knows that these can see in total "darkness". Using IR lights security systems illuminate a scene in a section of wavelengths invisible to the human eye. The CCD chip however is very sensitive to this light. Sony uses IR LED illuminators for their nightshot(TM) and nightframing(TM) modes on their digital still cameras and camcorders.
More and more camera manufacturers today offer focus assist lights. These can be laser, infrared, visible light or red LEDs. This focus assist helps the camera to focus when the abailable light is insufficient. It works great and allows to greatly extend the range of light conditions the camera works in.
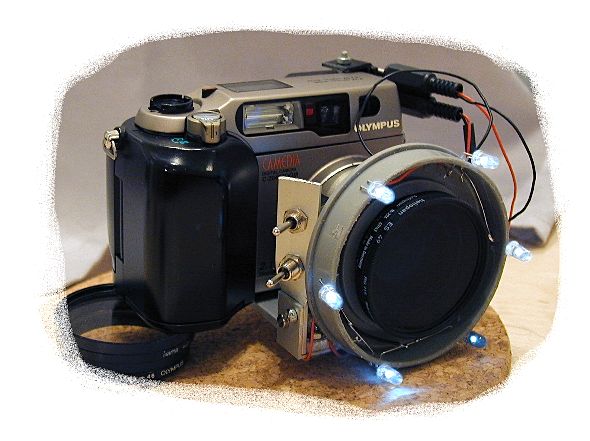
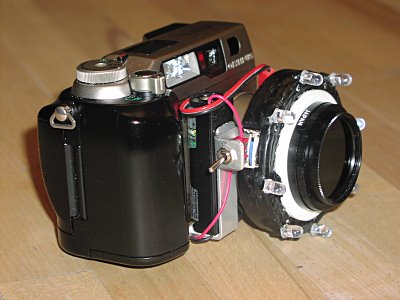
So, combining these ideas, I thought: Why not build IR-emitting LEDs into a ring around the lens barrel of my Olympus 2040IR? I wanted to be able to do both continuous illumination of a scene and a focus assist. This is fairly easy to accomplish: Using a switch that in one direction stays "on" when switched, while in the other direction is only "on" as long as tipped and is "off" in its center state, I can decide whether the LEDs should be on always (IR-Shot) or only as a focus assist (IR-Framing). Focus assistance works as follows:
- tip the switch to "on"
- frame the subject using the LCD monitor
- half-press the shutter release button (camera focusses and calculates the exposure)
- let the illuminator switch go while keeping the shutter half-pressed
- fully press the shutter relase button
There are no lasers involved, so you can use it for talking pictures at parties (with flash of course) that otherwise
would be impossible. You can also take pictures of animals in total darkness without disturbing them.
Pictures and a how-to will follow once my IR LEDs arrive and I find the time to build the LED "collar" for my lens barrel. I already have a setup in mind using plastic piping used for water lines in households.
Update as promised:
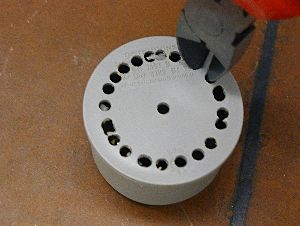
Take the plastic pipe, cut a hole big enough for the filter adapter.
I used multiple small holes and a wire cutting plier, reworking it with a rasp and knifes.
You can use a hole saw if you have one.
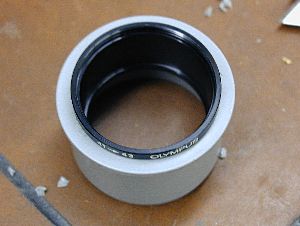
Test regularly if your filter adapater fits.
Prepare a slightly larger plastic pipe similarly that fits over the small one.
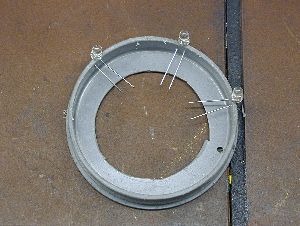
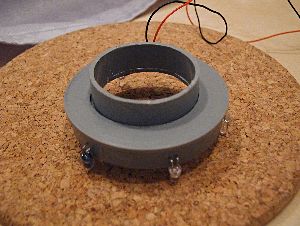
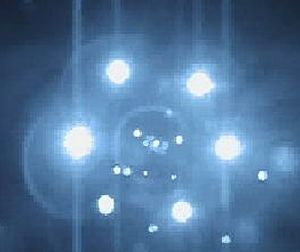
Front side of the collar, showing quick'n'dirty soldering.
3 LEDs are soldered in row, the two sets are used parallely.
I used IR LEDs from Conrad.de. Ordering number is 185809.
By soldering as stated above, each LED gets a voltage of about 5V/3=1.67V.
They are declared with a maximum continuous voltage of 1.5V,
so I think this should work out, as peak voltage is much higher.
I chose this LED, because it
- is powerful with 150 mW/sr when used at 1.5V. sr=steradiant (spherical angle)
- has a relatively focussed beam: 17°
- has a peak intensity of 875nm, closer to the maximum sensitivity of the CCD than other IR LEDs (950nm is common)
Please note that that are IR LED-clusters available which are not very expensive. I chose my construction as I wanted to power the LEDs by the 5 Volt voltage of my camera batteries. All available IR LED-clusters I know run with higher voltage.
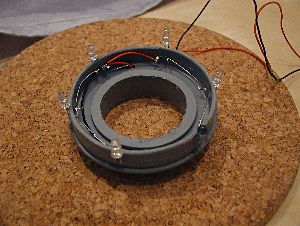
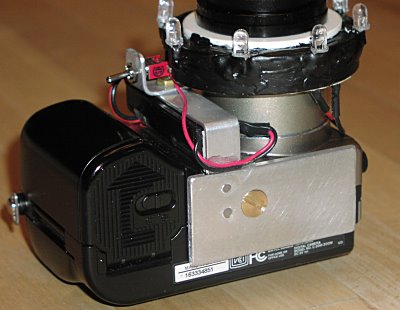
The collar from the rear (camera) side. The cables are connected to a plug (not shown).
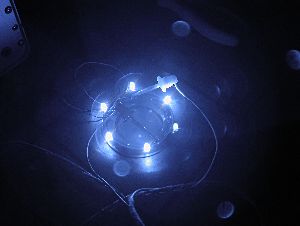
First test, attached to a professional DC power source.
It worked and there was no short circuit, so I could attach it to my camera's power socket.
I have not yet attached the IR collar to the special switch. Update will follow.
So, how does it work?
Very well. One "problem" is that the IR LEDs I use have a peak wavelength of 850nm, but they glow deeply red on a very tiny spot. If you dislike that, you can switch to LEDs with a peak wavelength of 950nm. I have one of those installed as a test. It is a bit darker in IR but shows no glow in visible light at all.
Another problem is that these LEDs are not designed for illumination. They are used in sending IR signals to a photo detector. Thus, their beam is a bit "bumpy". However, I think is works out quite well. This does not matter for IR-Framing, but for IR-Shot it could become a problem.
Focus assist (IR-Framing) works like a charme. Framing in total darkness is easy, flash exposure seems good, but slightly underexposed:
This was shot with an 715nm IR-pass filter.
Please note that IR-Framing is also possible with cameras that are less sensitive to IR light than my 2040IR.
It is only necessary that the camera can focus and determine the distance.
The flash will do the rest and provide ample visible light for the camera to get a picture.
One problem can occur when you do not use an IR pass filter. The camera focusses the infrared light but takes the shot with mainly visible light from the flash. IR and visible light focus is different! I suspect that in many cases the depth-of-field will make up for the slight misfocus, but you might find it unacceptable.
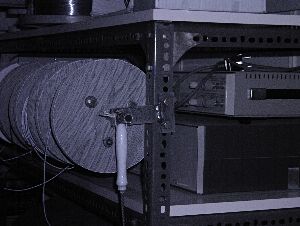
Proof that it also works quite well as an IR light source (IR-Shot):
mov video converted to avi, 1.7MB. Pan through my bathroom.
This will only be possible with cameras as sensitive to IR light as my 2040IR.
Planned modification:
I'll replace the one darker LED with a sixth bright LED. I will then use one or two of the darker LEDs and build them into a small IR light that attaches directly onto the power socket or the top of my 2040IR with velcro tape. This small light will be only used as a focus-assist. The result is a vastly smaller assembly.
Another Version
Charles, one of my visitors, has created his own take on an IR LED collar and I must say, his is probably the better solution, as it has no need to mess with the cameras electric circuit!
He writes:
Notice how I "copy catted" your IR Diode setup.
I used 8 Emitters instead of 6...
All are in Parallel & powered by 1 2500mah MIMH cell. This works great.
I mounted on a bottom plate & secured using the Tripod mounting Screw hole.
I have a small machine shop, with a Lathe & Milling Machine,
so it was easy to cut the PVC pipe fittings for the IR Emitter "ring".
I also cut grooves around the outside & back to lay the wires in & epoxied them in the grooves.
I now wish I had taken pictures at each step, so I could show you.
Thanks for the input, I think others interested can see how you did it:
Back to the Olympus C-x0y0 modding page
This section applies to the following cameras:
- Olympus C-2000 Zoom
- Olympus C-2020 Zoom
- Olympus C-2040 Zoom
- Olympus C-3000 Zoom
- Olympus C-3020 Zoom
- Olympus C-3030 Zoom
- Olympus C-3040 Zoom
- Olympus C-4000 Zoom
- Olympus C-4040 Zoom
- Olympus c-5050 Zoom
when the IR blocking filter has been removed. Alternatively, you can use visible light LEDs to make it work
with any Olympus C-x0y0 Zoom.
copyright 2004...05 by jensroesner.de